Exterior Siding Installation: Tips for Beginners

Key Highlights
- Vinyl siding is an affordable and durable choice, making it ideal for improving the look of your home.
- Correct preparation and tools, like circular saws, utility knives, and furring strips, ensure a successful installation.
- Allow gaps for expansion and contraction to prevent product failure caused by weather changes.
- Proper installation techniques, including the use of starter strips and corner posts, enhance the final durability and appearance.
- Measuring square footage accurately is the first step in purchasing the right materials.
Introduction
Exterior siding installation is a great way to refresh the look of your home, especially if it’s new construction. Vinyl siding installation is a top choice because it is durable, affordable, and easy to maintain. This guide provides important siding installation tips to help transform your home’s appearance smoothly. Whether this is your first installation or you are replacing old siding, understanding the basics will support you throughout the process from start to finish.
Understanding Exterior Siding Basics
 Siding plays an important role in protecting your home’s outside and making it look nice. It helps keep moisture out and can also be a key feature of your property. Understanding siding materials and how they work, like nail slots and insulation, is key for a successful installation.
You should know how siding panels overlap and how they help keep out rain and snow. It’s also vital to use a moisture barrier to prevent product failure. Vinyl siding is a popular choice because it lasts a long time. It is important to use proper fitting techniques and materials, like stainless steel nails, for stability. By learning these basics, you will feel ready to take on different projects with confidence. You will achieve a professional look that lasts.
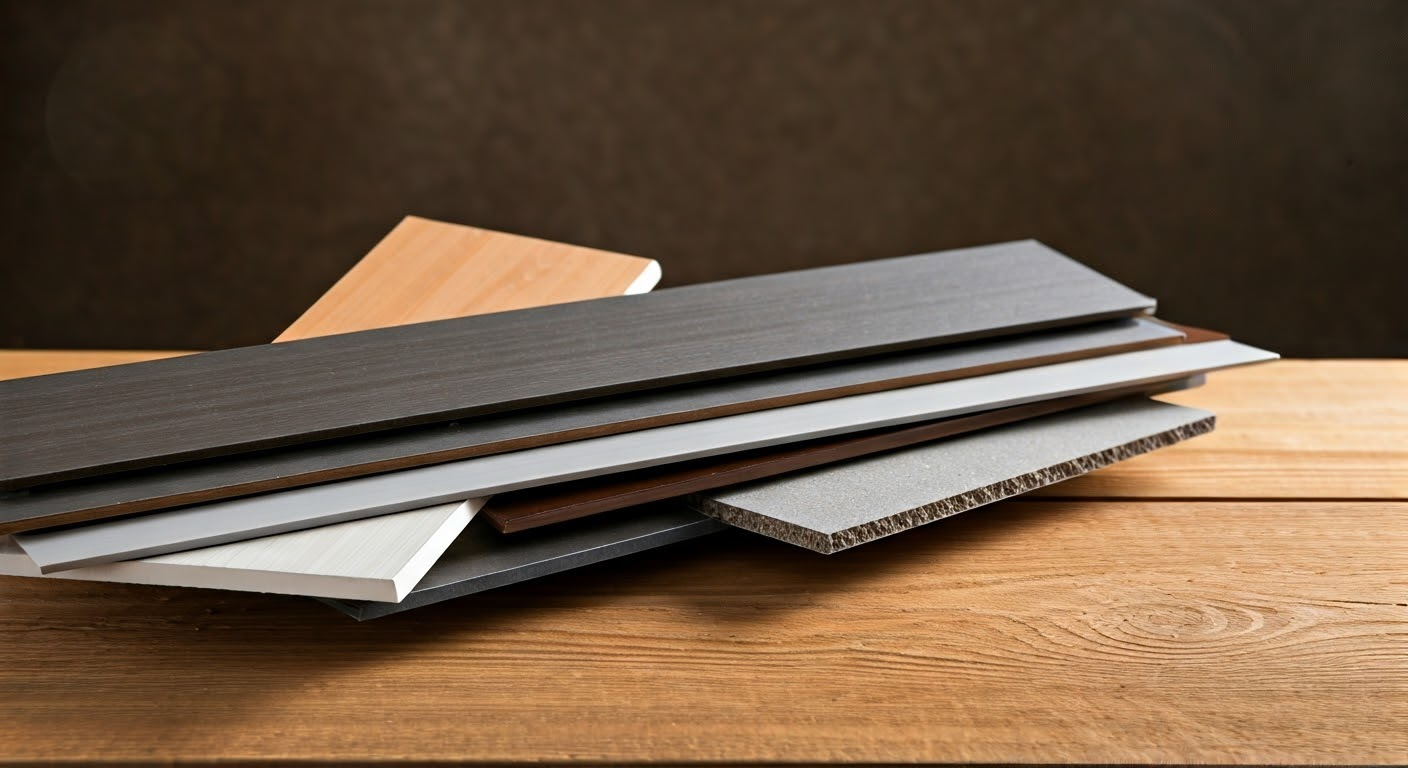
Types of Siding Materials
Vinyl Siding
Vinyl is a flexible and affordable option for siding. It comes in many colors, textures, and thicknesses. This lets homeowners choose what they like while enjoying long-lasting durability and easy care. Vinyl can resist moisture and humidity, making it a good fit for different weather conditions.
Wood Siding
Wood siding has a charming and classic look but needs more care over time. It adds rustic beauty but is more vulnerable to moisture damage compared to vinyl. To prevent product failure, it is crucial to properly seal and maintain wood siding.
Stainless Steel Siding
Stainless steel offers great durability and a modern look. It won’t rust and won’t buckle in different weather, making it perfect for commercial projects or sleek designs. However, it is heavier than vinyl or wood, so you need the right tools and a solid nailable base for installation.
Benefits of Proper Siding Installation
Preventing Moisture Damage
When siding is installed carefully, it forms a strong moisture barrier. This keeps water from getting into the structures underneath. This is important to stop rot and keep the insulation working well over time.
Ensuring Durability
Good installation methods increase the strength and life of your siding. This reduces the risk of buckling or uneven gaps. It helps achieve a smooth look that can stand up to changing weather and everyday use.
Avoiding Product Failure
If the installation is not done right, it can cause problems later on. This includes issues like mismatches in expansion and damage to accessories. By following proper guidelines, like leaving space for contraction and choosing the right nails, you can make sure things go smoothly and avoid expensive repairs later.
Now, let’s get the workspace ready before we start the installation.
Preparing for Siding Installation
 Preparation is key to making sure your siding project goes well. First, check the outside walls for any problems like rotten boards or bumps. If necessary, you can add furring strips to even out the base, especially in older homes.
Next, tidy up your work area by tying back bushes and removing items like lights and downspouts that could cause problems. These initial steps help create a good setup for putting on the siding, making sure the panels stick on correctly.
Call or text Precision Roofing Canada! (613) 404-7805
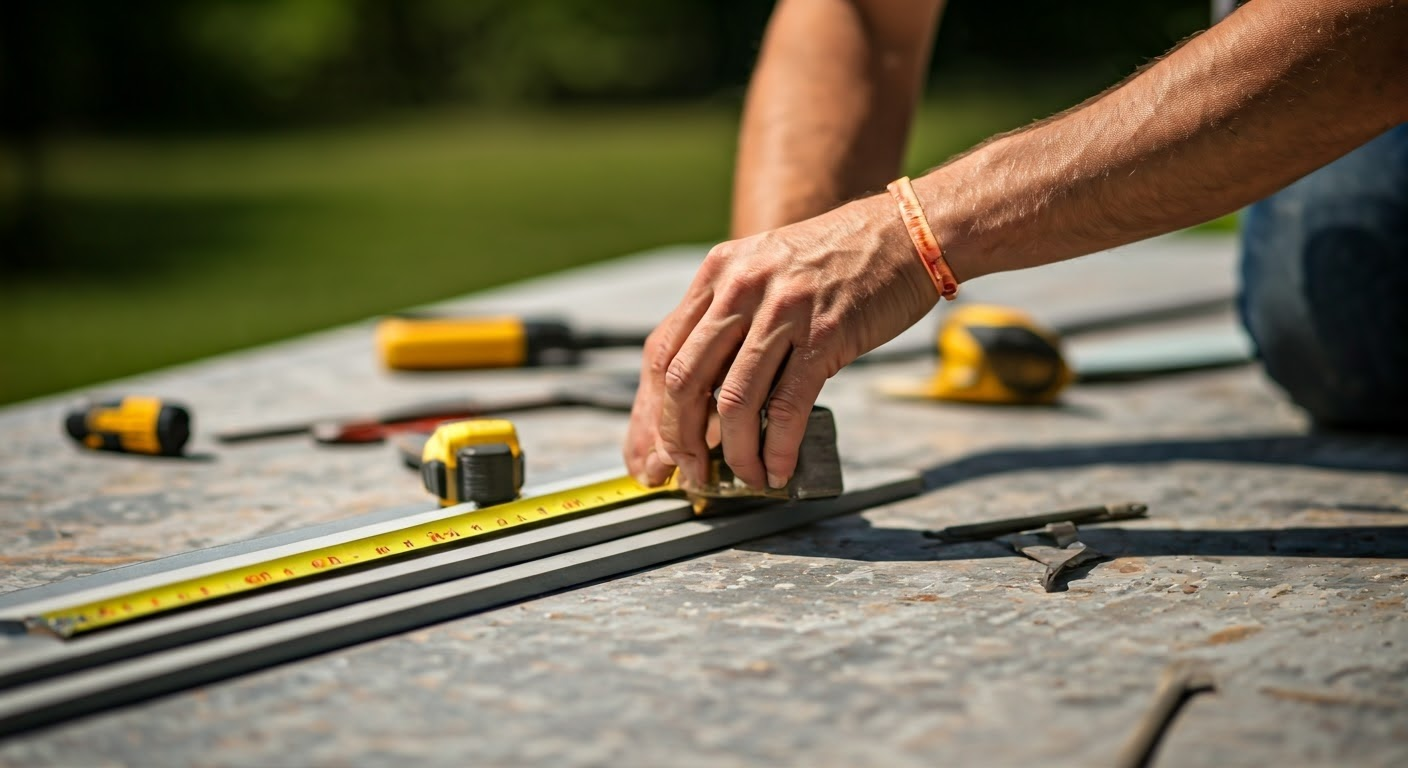
Tools and Materials Needed
Having the right tools is very important for getting good results when you install siding. The main tools you need are:
- Cutting tools: Circular saws, miter saws, utility knives, and tin snips for making clean cuts.
- Measurement tools: Tape measure, chalk line, and level to help align everything correctly.
- Fasteners: Use galvanized stainless steel or corrosion-resistant roofing nails to keep things stable.
You will also need key materials like vinyl siding panels, starter strips, corner posts, and insulation layers. Having these accessories ready will help you get the proper fit and overlap. It will also protect against buckling and moisture. Make sure to use sawhorses or work tables to handle and store the siding pieces easily during your project.
Next, let’s talk about how to estimate materials accurately.
Measuring and Estimating Materials
Accurate measurements help you save time and money when installing. Here are some easy steps to follow:
| Material | Calculation Method |
|---|---|
| Square Footage | Multiply length by height for each wall and add them all up. |
| Nailable Base | Count corner posts and edges of windows to get extra estimates. |
| Accessories | Measure rooflines, soffits, and what you need for the J-channel. |
Use a chalk line to mark starter strips and make width adjustments. Keeping your measurements the same helps accessories like corner posts fit well. Be careful when it’s cold outside and remember to leave gaps for expansion in important areas.
With our materials ready, it’s time to install the siding!
Step-by-Step Guide to Installing Siding
Installing siding is easy if you have a clear plan. First, get the walls ready. Remove any damaged parts and add insulation or furring strips to make the surface even.
Next, each siding panel should fit over the starter strip. Make sure to space the nails properly. Moving around the house in order keeps the overlap even and helps avoid mistakes. Let’s go through the installation steps, starting with preparing the wall surface.
Step 1: Surface Preparation
Creating a strong base is the first step. First, check for any moisture damage. Then, use a claw hammer to secure any loose boards tightly. Remove old caulking from windows. Replace rotten wood trim that might affect stability.
Next, install furring strips on walls that are uneven. This will help ensure the finished look is smooth. For masonry surfaces, use masonry nails to properly hold the panels in place.
Make sure insulation fills in gaps and keeps moisture out, so the siding stays secure. These steps will help ensure a perfect installation.
Step 2: Starting the Installation
Placing the starter strip is very important for the whole siding project. Make sure to line it up with the chalk line you drew earlier. Also, leave a ¼-inch gap between sections for expansion.
Next, install the corner posts. They need to be straight and secure. Start by nailing them at the top. Center the nails in their slots. This way, you can adjust the posts up and down. Do not hammer too tightly so there is room for expansion because of the weather.
After the starter strip and corner posts are in place, you can start locking in the siding panels easily.
Step 3: Techniques for Aligning Siding Panels
Aligning siding panels the right way gives a smooth finish. First, center the nails in the nail slots to stop buckling. Allow 1 to 1¼ inches for overlaps to achieve a proper fit.
Make sure the panels lock tightly with the one below without pulling them too much. This keeps the right fit and helps avoid uneven looks.
Work in a clear way by staggering the panel joints. Think about areas facing traffic, like windows and doors, to improve curb appeal. After everything is aligned, you can secure the panels!
Step 4: Securing the Siding
Securing siding panels is the last step for stability. You need to drive nails straight through the nail head of each panel. Keep a 1/16-inch space to avoid distortion when the weather changes.
Place nails carefully at the cut edge of the panels. Make sure there are no sharp edges that could lead to product failure. The siding panels should fit into place easily without being stretched out of shape before you secure them.
Space the nails evenly, about 12-16 inches apart. This will help create uniformity and durability for the outside of your home.
Conclusion
By using the tips in this guide, you can handle your exterior siding installation easily. First, it’s important to know about the different types of siding materials. Then, prepare well and follow the installation steps carefully to get a good finish. Keep in mind that spending time and effort at the beginning will improve how your home looks and make it last longer. Whether you are new or want to improve your skills, this guide will help you with the siding installation process. If you are ready to learn more about your siding project, contact us for a free consultation. You will get expert advice that suits your needs.
Frequently Asked Questions
How to Maintain Exterior Siding?
Regular care helps keep your siding looking good. You can clean it using a pressure washer or a soft brush. This stops moisture from building up. Fill gaps with caulking, sealant, or a sealer to strengthen insulation. It’s a good idea to have inspections two times a year for lasting siding performance.
What Are Common Installation Mistakes to Avoid?
Avoid making serious mistakes like using tools the wrong way, which can cause product failures. Improper handling of masonry and fascia can make installation hard. When using Kaycan tools, make sure to keep proper gaps and avoid tightening nails too much. This will help you succeed in your siding installation.
We also offer emergency roof repairs, Roof Inspections, Roof Vent Replacement, Insurance Claim Assistance, gutter cleaning and maintenance, Siding Repairs, eavestrough installation and repairs, and Chimney Removal.
Call or text Precision Roofing Canada! (613) 404-7805
380 Sweet Grass Circle,
Ottawa, ON K2J 5W9
Facebook | Google Business Page | YouTube | Contact Us | Blogger | IKO Roofing Products | Linkedin | Better Business Bureau | Flickr |